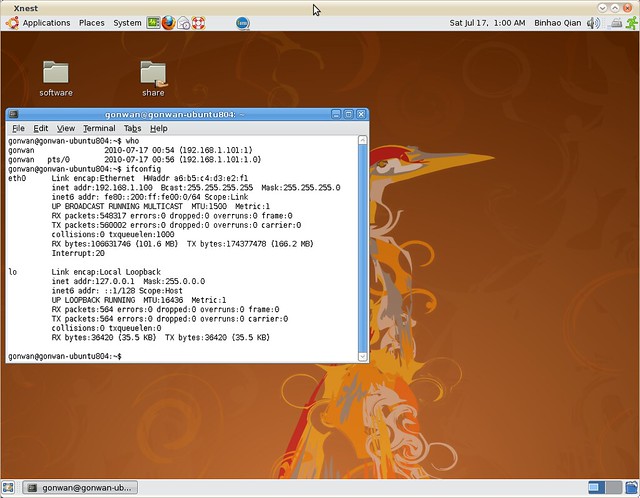
I read this article when Lucid was just released. It works good, but there’s no window icon in the title bar(See my previous screen-shots).

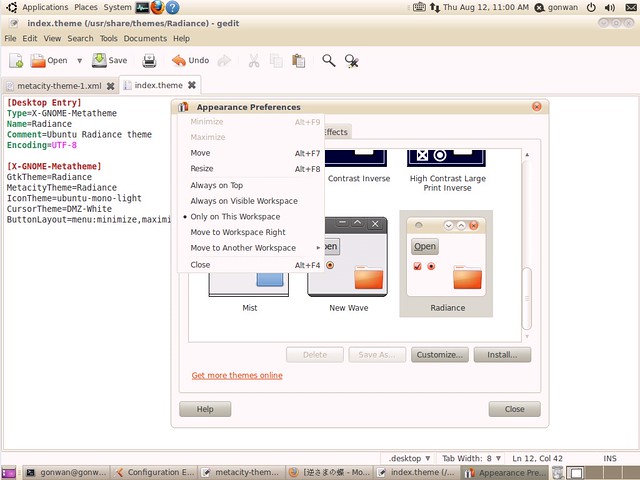
Then I tried to modify the theme files. Take “Radiance” theme as example:

Change the last line into:

This will set your window button order. And every time you switch to “Radiance” theme, no confirm dialog will prompt to tell that the button order will be changed. Then:

Search “menu_focused_normal”, there are four lines regarding graphics drawing of menu: “menu_focused_normal”, “menu_focused_prelight”, “menu_unfocused_prelight”, “menu_unfocused_prelight”. Add first line into “menu_focused_*” and remove the image tag, and use second line to replace the image tag in “menu_unfocused_*” too.

OK, you’re done.

lucid_menu_icon

Update Feb 17, 2012: You can simply run:

In company, I use VNC to control remote machines. But in GDM stage, this does not work. Maybe VNC server in Ubuntu is a service in Gnome session. The solution is to use XDMCP(X Display Manager Control Protocol). Using Ubuntu, “xnest” package should be installed on both server and client side. It’s a nested X server that simply relays all its requests to another X server, where it runs as a client:

In server side,  go to System –> Administration –> Login Window, or simply run “gdmsetup”. Go to “Remote” tab, set value to “Same as Local”.

In client side, go to Applications –> Internet –> Terminal Server Client, or simply run “tsclient”. You’ll find the XDMCP protocol type can be selected now. Enter your server address to connect.

Here’s my screenshot. The output of command “who” and “ifconfig” had different IP addresses:

ubuntu_xdmcp

Since xnest sends and receive all X Server data, it consumes a lot of bandwith. On my laptop using wireless networking, it’s somewhat slow.

I installed Cairo-Dock when installing Lucid. And it automatically enabled some desktop effects. Nowadays, I found these effects make my desktop less responsive. So, I decided to turn off them. First, I thought they were compiz effects. I was wrong. Actually, they are metacity compositing effects and come with gnome 2.22 and later versions.

To disable them, run:

And this command to enable them:

Additional info:
http://blogs.gnome.org/metacity/category/compositing/

Since I chose SVN as my VCS in google code, a SVN GUI client may be helpful. I found kdesvn. It’s free, powerful, and just there in the Ubuntu repository:

The 2nd line is used to fix the bookmark issue in kdesvn :).

Then invoke the line below first:

This will create a default configuration directory for SVN in ~/.subversion/. In fact, any SVN command will do. There are configuration files located in /etc/subversion/. But they seems to be of no use.

Note, kdesvn will use SVN configuration files when perform operations. Now, we need to edit them.

1. Proxy

Uncomment and modify the following lines in [global] section:

It seems that we can use separate settings for different host groups. This is not verified, leaves to you.

2. Password

SVN 1.6 added gnome/gnome-keyring and kde/kwallet credentials management support. Some additional options were introduced.

2.1 SVN 1.4.6 (Ubuntu 8.04, Hardy)

Uncomment and modify the following lines in [auth] section:

You’re done. The 1st option prevents SVN from saving plain-text password locally. The 2nd even stops caching the credentials. Then every time you need an SVN authentication, a prompt appears.

Note: you cannot find an option in kdesvn’s configuration to set a user/password values. The application just use cached key values in ~/.subversion/auth/ directory.

2.2 SVN 1.6.6 (Ubuntu 10.04, Lucid)

If you do not want to save password, set the 2 values as that in Hardy. But they are deprecated and moved to ~/.subversion/servers.

Uncomment and modify the following lines in [global] section:

Then the ~/.subversion/config file:

Uncomment and modify the following lines in [auth] section. Set to empty:

You’re done! All SVN behaviors are consistent with that in Hardy.

If you want to integrate with gnome-keyring or kwallet, modify the line to contain “gnome-keyring”, “kwallet” or both. Gnome-keyring does not integrate well with SVN, so I chose kwallet and have a test.

In kdesvn, go to Settings –> Configure Kdesvn –> Subversion, check the “Store passwords into KDE Kwallet” option. It’s the default configuration. Make sure that the option and the “password-stores” value are consistent. Otherwise, our kdesvn fail to commit code. When a kdesvn prompts to ask for username/password, check “Store password (into KDE Wallet)” option. Then you can view your saved login information in KWallet Manager application:

Some other screenshot of kdesvn in Lucid:

Main Window:

lucid_kdesvn

Revision Tree:

lucid_kdesvn_2

From last blog, I’ve demostrated the usage of Ubuntu *-dbg packages. However, not all *-dbg packages seem to work as libssl0.9.8-dbg. For instance, libcurl3-dbg and libqt4-dbg packages do not work. I’m afraid some debug info are missing in these two packages. I’m not sure.

I googled a lot, but was not able to find a solution. So I decided to build the debug version of the two library myself. Here are steps for libcurl:

After all, the compiled binary is located in /home/gonwan/testgdb/curl-7.19.7/lib/.libs/. Note, this is a hidden folder.

Here comes our test code:

Build commands:

I use /usr/lib/libcurl.so.4 instead of lcurl, since lcurl will link the binary to /usr/lib/libcurl-gnutls.so.4. But I currently cannot afford it :(. Last, start our GDB:

It prints the backtrace now, though I’m not so accustomed to console debugging. I add the LD_LIBRARY_PATH environment to let our test program find our homemade version of libcurl.so.4. In fact, we can run ldd like following lines. You see the re-direction?

Later, I successfully made it possible to debug Qt source code in IDE. I chose QtCreator, since it has both windows and linux version, and it’s easy to install and configure. I also built my homemade version of Qt:

I only built the most common modules, excluding webkit, script, xmlpatterns, phonon, multimedia and declarative modules. It took only 25 minutes to finish (An entire build under windows may take 3 – 4 hours.). After all, start your QtCreator, create a Qt console project with the source below:

Build the project in debug mode. And now, here’s the magic: Go to Project tab –> Run Settings –> Run Environment, append our homemade Qt library path to LD_LIBRARY_PATH. In my example, it’s /home/gonwan/testgdb/qt4-x11-4.6.2/lib. Ok, you’re almost done! Go back to the Edit tab, set a breakpoint at line 4 (or line 3 as you like), press F5 to start debugging the project. Then continue pressing F11, you will find GDB has stepped into Qt source code! Let me take a screenshot:

qtcreator_qt4debug

In order to load our homemade *.so, we can also run “make install”.