Continue with Updating Kernel in Lucid, I want to decrease overview build time this time. My benchmark is run in Ubuntu 10.04 installed in Virtualbox. My CPU is i5-2540M at 2.6GHz.

I’m learning kernel code these days. A minimal kernel will save a lot of build time. As you see, it took 64min to build 2772 modules when running oldconfig target:

Build Time Build Modules Package Size
oldconfig 64min 2772 33MB
localmodconfig 16min 244 7MB
localmodconfig + ccache 1st time 19min 244 7MB
localmodconfig + ccache 2nd time 7min 244 7MB

Fortunately, a new build target localmodconfig was added in kernel 2.6.32 that just helps:

It runs “lsmod” to find all the modules loaded on the current running system. It will read all the Makefiles to map which CONFIG enables a module. It will read the Kconfig files to find the dependencies and selects that may be needed to support a CONFIG. Finally, it reads the .config file and removes any module “=m” that is not needed to enable the currently loaded modules. With this tool, you can strip a distro .config of all the unuseful drivers that are not needed in our machine, and it will take much less time to build the kernel.

The build time was dramatically decreased to 16min to build only 244 modules. It could still boot my VM to desktop, and everything was working fine. However, it failed to mount an *.iso file, since the module was not in lsmod when building I think. To use localmodconfig target, run:

It may end up with errors. Please ignore, a new .config file is already generated. Then remember to turn off the CONFIG_DEBUG_KERNEL option in the .config file, as mentioned in my previous article.

Then ccache is used. I downloaded the source code and built myself, since the 3.x version seems to be faster than 2.4.x version:

Default prefix(/usr/local) is used here. Last 2 lines created symbolic links(named as the compiler) to ccache, to let ccache masquerade as the compiler. This is suggested in ccache’s man page.

So why bother a compiler cache? The makefile doesn’t work?

If you ever run “make clean; make” then you can probably benefit from ccache. It is very common for developers to do a clean build of a project for a whole host of reasons, and this throws away all the information from your previous compiles. By using ccache you can get exactly the same effect as “make clean; make” but much faster. Compiler output is kept in $HOME/.ccache, by default.

The first run creates the cache, and the second benefits from the cache. That’s it.

To display ccache statistics, run:

Old kernels have less code. So They are easier to learn and understand. I follow the instructions here: http://www.oldlinux.org/. You can also download the eBook in the website(In Chinese).

I managed to run the kernel in Hardy(8.04) and Lucid(10.04) using Bochs simulator. In Ubuntu, you may install it by typing:

To compile the source, you may also want to install the assembler:

I downloaded the source here: http://www.oldlinux.org/Linux.old/kernel/0.1x/linux-0.11-040327-rh9.tar.gz. But it works only in RedHat 9(RHEL3, CentOS3) with gcc-3.2 and bochs-2.2. Then I patched the source code with the help of google. Finally, it compiled under gcc-4.1/gcc-4.2 and ran happily. Due to optimization issues, gcc-4.3 and above build the wrong kernel. I do not know how to solve this. I also downloaded the Bochs harddisk image here: http://oldlinux.org/Linux.old/bochs/linux-0.11-devel-060625.zip.

You may encounter syntax error using the including bochs configure file. Refer to a sample one found in /usr/share/doc/bochs/examples/bochsrc.gz. Basically, you should specify the image path of your floppy(kernel image) and harddisk like:

Then make sure the boot option is:

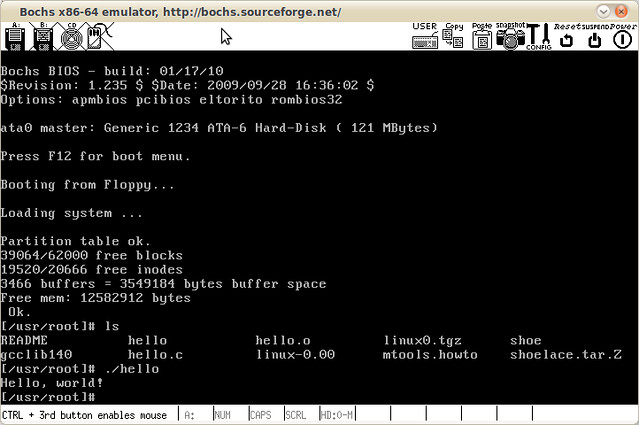
Now let’s see the screenshot when running the classic kernel:

linux011_bochs_simulation

Today, I built the mainline kernel v2.6.33.4 on Lucid. Most instruments were taken from here: https://wiki.ubuntu.com/KernelTeam/GitKernelBuild:

1. Unpack:

2. Config:

The last line is optional. The wiki said:

Note that Ubuntu kernels build with debugging information on, which makes the resulting kernel modules (*.ko files) much larger than they would otherwise be (linux-image*.deb will be 200-300 MB instead of 20-30 MB). To turn this off, go into “Kernel hacking”; then, under “Kernel debugging”, turn off “Compile the kernel with debug info”.

It’s outdated maybe. When building kernel 2.6.24.x in Hardy, It WAS 200-300MB. But in Lucid, it is always 20-30MB. When you turn off the option, the build process took 80min instead of 100min, and 800MB instead of 5G storage. The option is configured by “CONFIG_DEBUG_KERNEL” in .config file.

3. Build:

After all, two files were generated. It contains 2772 modules. You may find the usage of “–append-to-version” and “–revision” options here:
*) linux-headers-2.6.33.4-custom_2.6.33.4-1_i386.deb
*) linux-image-2.6.33.4-custom_2.6.33.4-1_i386.deb

4. Install:

The last 2 lines are NOT mentioned in the wiki. They are used to generate the initrd image in Lucid. The build also do not generate abi and vmcoreinfo files in /boot.

5. Reference:

http://ubuntuforums.org/showthread.php?p=9120942

It seems a little easier when building Lucid kernel from ubuntu source.

1. Tools:

2. Sources:

3. Customize:

cd into “linux-2.6.32” root.

I selected “core2” as my custom name.

Then patch some files:

*) debian.master/etc/getabis:
From: getall i386 generic generic-pae 386
To: getall i386 generic generic-pae 386 core2

*) debian.master/rules.d/i386.mk:
From: flavours = generic generic-pae 386
To: flavours = generic generic-pae 386 core2

Now, edit the config file. You will have to go through all the flavors for this script to work properly:

You should not make changes to any of the configurations until you see the core2 configuration:

I disabled the “Kernel hacking ==> Kernel debugging” feature to accelerate build process. If you got the error like:

Simply add the x permission to all scripts, it’s a known bug:

4. Build:

If you got the error like:

Add option “skipmodule=true” to the last command line. If you got:

Add option “no_dumpfile=true” to the last command line. And there will be no vmcoreinfo-2.6.32-22-core2 file.

5. Done:

I found that Lucid has 2675 driver modules while Hardy has only 1921. It seems the kernel was greatly enhanced between the two releases.

My T60 has a Duo Core 1.83G CPU. It took about 90 minutes to finish. The kernel also consumed about 4G storage T.T. After all, two *.deb files were generated:
*) linux-headers-2.6.32-22-core2_2.6.32-22.33_i386.deb
*) linux-image-2.6.32-22-core2_2.6.32-22.33_i386.deb

6. Others:

Since the build process used so much storage, I was monitor my available disk space from time to time using “df” utility. I found the “free space” is about 500M larger than “available space”. What happened? Then I found the answer here: http://ubuntuforums.org/showthread.php?t=328786&page=3
. We can use “tune2fs” utility to set the size of reserved space:

Set the percentage of the filesystem which may only be allocated by privileged processes. Reserving some number of filesystem blocks for use by privileged processes is done to avoid filesystem fragmentation, and to allow system daemons, such as syslogd(8), to continue to function correctly after non-privileged processes are prevented from writing to the filesystem. Normally, the default percentage of reserved blocks is 5%.

7. Reference:
https://help.ubuntu.com/community/Kernel/Compile
http://blog.avirtualhome.com/2010/05/05/how-to-compile-a-ubuntu-lucid-kernel/

Hardy(8.04) is a little different from all the other versions when building a kernel. Only Hardy has two packages for kernel installation: linux-image, linux-ubuntu-modules. If you do not install the latter one, your sound card and network card will can not be recognized.
Today, I built the kernel from the ubuntu source(not the original kernel source). So, I could use the including debian scripts for convenience. Here’s the steps:

1. Tools:

2. Sources:

The source will be downloaded in the current directory.

3. Customize:

cd into “linux-2.6.24” root.

I selected “core2” as my custom name.

Then patch some files:

*) debian/scripts/misc/getabis:
From: getall i386 386 generic server virtual
To: getall i386 386 generic server virtual core2

*) debian/rules.d/i386.mk:
From: flavours = 386 generic
To: flavours = 386 generic core2

4. Build:

If you get errors like:

Run the following command, it is issued by the Makefile:

5. Done:

My PC has a P4-2.6c CPU. It took about 90 minutes to finish. The kernel also consumed about 2G storage. After all, three *.deb files were generated:
*) linux-headers-2.6.24-27-core2_2.6.24-27.69_i386.deb
*) linux-image-2.6.24-27-core2_2.6.24-27.69_i386.deb
*) linux-image-debug-2.6.24-27-core2_2.6.24-27.69_i386.deb

6. Customize modules:

First, generate prepare scripts:

cd into “linux-ubuntu-modules-2.6.24-2.6.24”

Note: Custom modules name must match the custom kernel name, say “core2”.

Then patch some files:

*) debian/rules.d/i386.mk:
From: flavours = 386 generic
To: flavours = 386 generic core2

*) debian/rules.d/0-common-vars.mk (To prevent error in build step, debian/rules.d/3-udebs.mk):
From: disable_d_i = no
To: disable_d_i = true

Now generate new debian/control, which includes new custom kernel:

7. Build modules:

8. Done again:

This time, it took 30 minutes and consumed 300M storage. Two *.deb files were built:
*) linux-headers-lum-2.6.24-27-core2_2.6.24-27.45_i386.deb
*) linux-ubuntu-modules-2.6.24-27-core2_2.6.24-27.45_i386.deb

9. Install kernel:

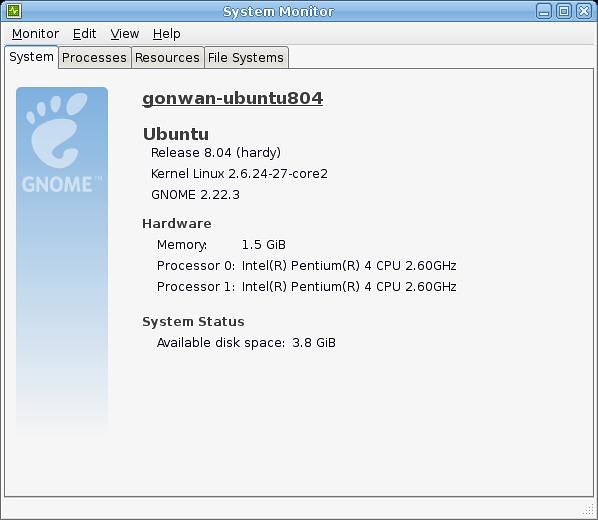
Just double-click or install using the dpkg utility. Here’s my screen-shot:

hardy_kernel

10. Reference:

https://help.ubuntu.com/community/Kernel/Compile
http://blog.avirtualhome.com/2009/09/08/how-to-compile-a-kernel-for-ubuntu-jaunty-revised/
http://ubuntuforums.org/showthread.php?t=912322